Installation and Setup
This page walks through a first-time install of the Tamaki MES module on an Ignition gateway. By the end you will have:
- The
.modlinstalled and licensed - A database connected and tables created
- Module settings reviewed and saved
Once you finish here, continue with Perspective Project Setup to install the visualization layer.
Prerequisites
| Requirement | Details |
|---|---|
| Ignition gateway | 8.3.6 or newer in the 8.3 line, running and reachable in a browser |
| Gateway admin | An Ignition user with permission to install modules, manage licenses, and edit gateway config |
| Required IA modules | Perspective, Reporting, and Tag Historian must already be installed |
| Database | An empty schema you control: MariaDB is recommended for first-time setups; MySQL, MSSQL, and PostgreSQL are also supported |
Tamaki MES does not create the database itself: you create the empty schema and point the module at it. The module creates and migrates all tables on first start.
1. Download the install assets
Sign in to the Tamaki Software downloads page and grab both of these for the same release:
Tamaki-MES-<version>.modl: the gateway moduleTamakiMES-perspective-project-<version>.zip: the Perspective project bundle (installed in the next guide)
Keep the version of both files in sync. A 2.2.x module is meant to run against the matching 2.2.x project.
2. Install the module
- In the Ignition gateway, go to Config → System → Modules.
- Scroll to the bottom and click Install or Upgrade a Module….
- Select the
.modlfile you downloaded and click Install. - If the gateway prompts about an unsigned certificate, accept it and continue.
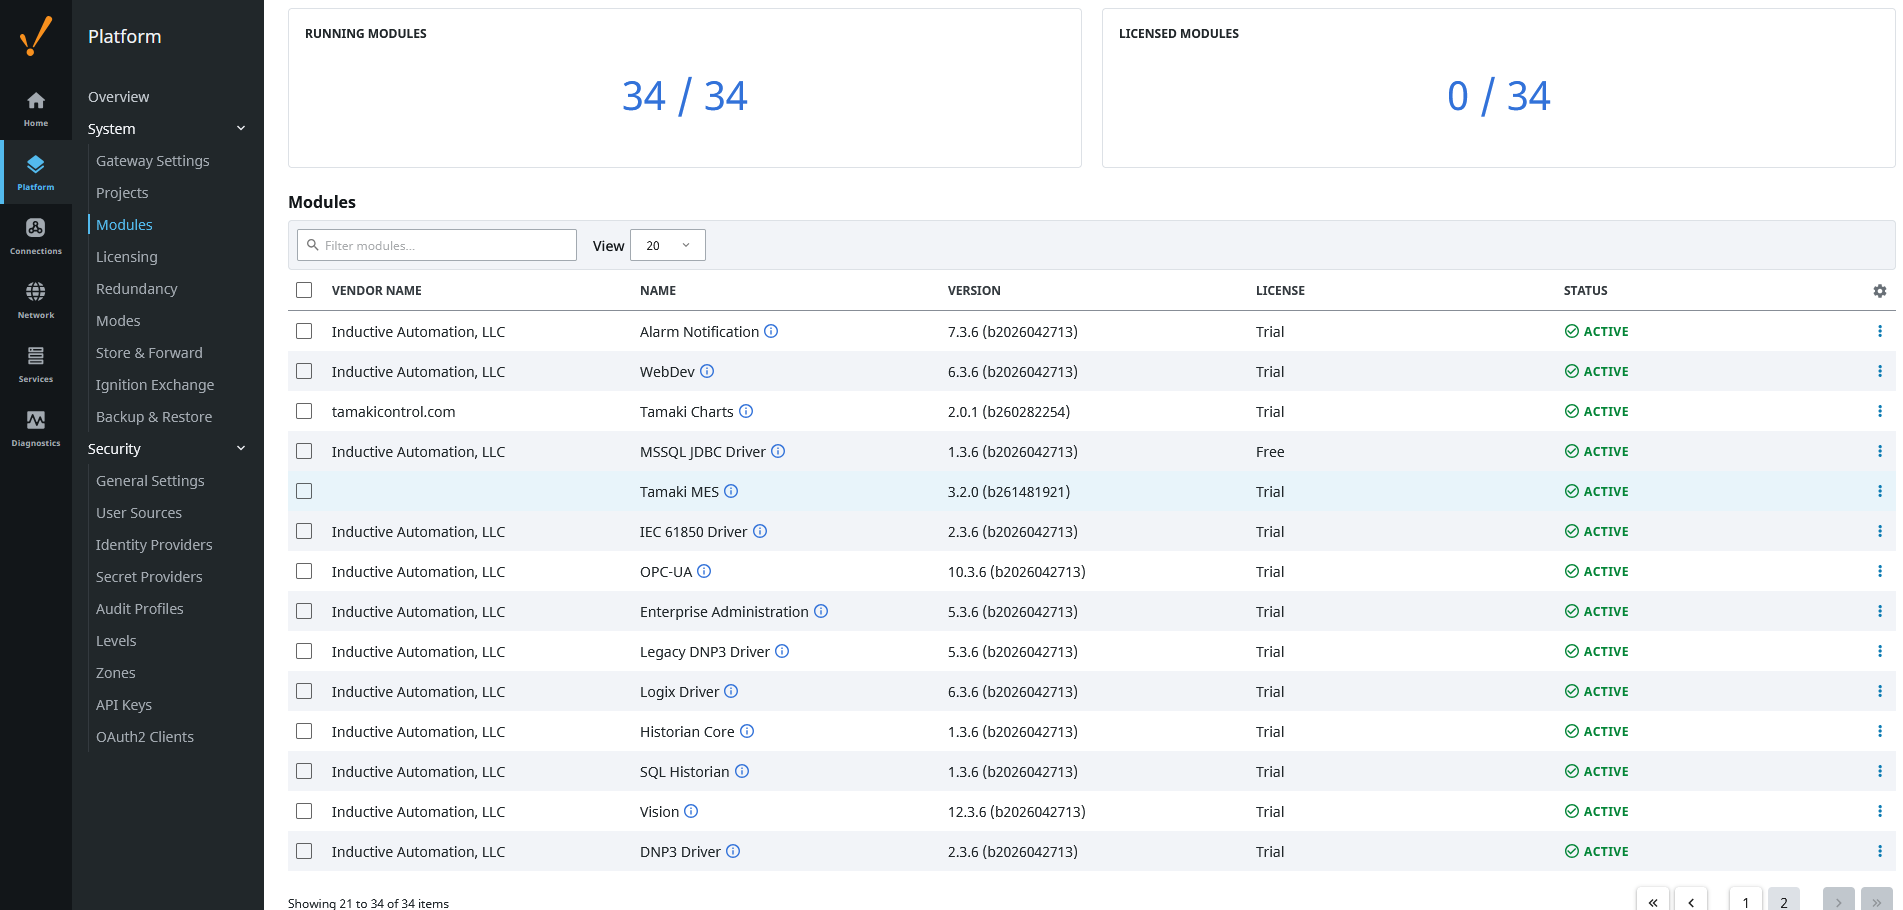
After a few seconds the Tamaki MES row appears in the modules list. The state will say Running but the module is not yet useful: you still need to license it and point it at a database.
3. Activate the license
Tamaki MES starts in trial mode as soon as the .modl is installed, so you can finish configuration and try things out before activating. When you are ready to license the module:
- Request a quote on the Tamaki Software pricing page. Tamaki will generate a license key and send it to you.
- In the gateway, go to Config → System → Licenses.
- Apply the license key Tamaki provided.
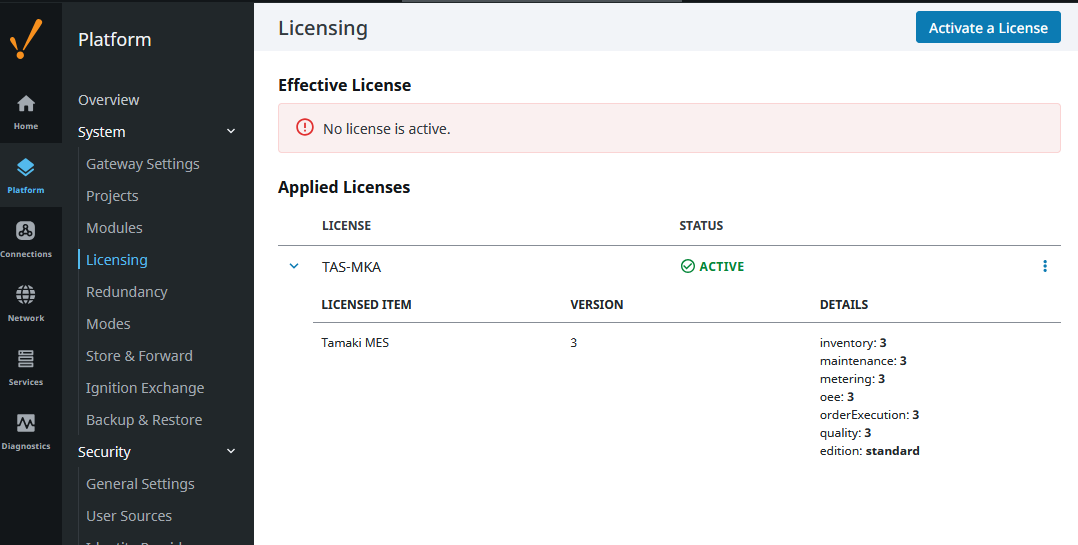
Once the trial expires, license-gated Script API methods will reject calls until a license is activated. The settings page itself remains available either way.
4. Create the database connection
-
Create an empty schema on your database server. For MariaDB:
CREATE DATABASE tamaki_mes CHARACTER SET utf8mb4 COLLATE utf8mb4_unicode_ci;CREATE USER 'tamaki_mes'@'%' IDENTIFIED BY 'replace-me';GRANT ALL PRIVILEGES ON tamaki_mes.* TO 'tamaki_mes'@'%'; -
In the Ignition gateway, go to Config → Databases → Connections and click Create new Database Connection….
-
Pick the JDBC driver that matches your database server (MariaDB, MySQL, Microsoft SQLServer JDBC Driver, or PostgreSQL).
-
Fill in the connection string, username, and password. Save.
-
It is recommended to allow for 50 – 100 connections to the database. The default is 8 and this is not enough for the module to run smoothly, especially with OEE and Inventory data collection features.
-
Wait for the Status column to show Valid.
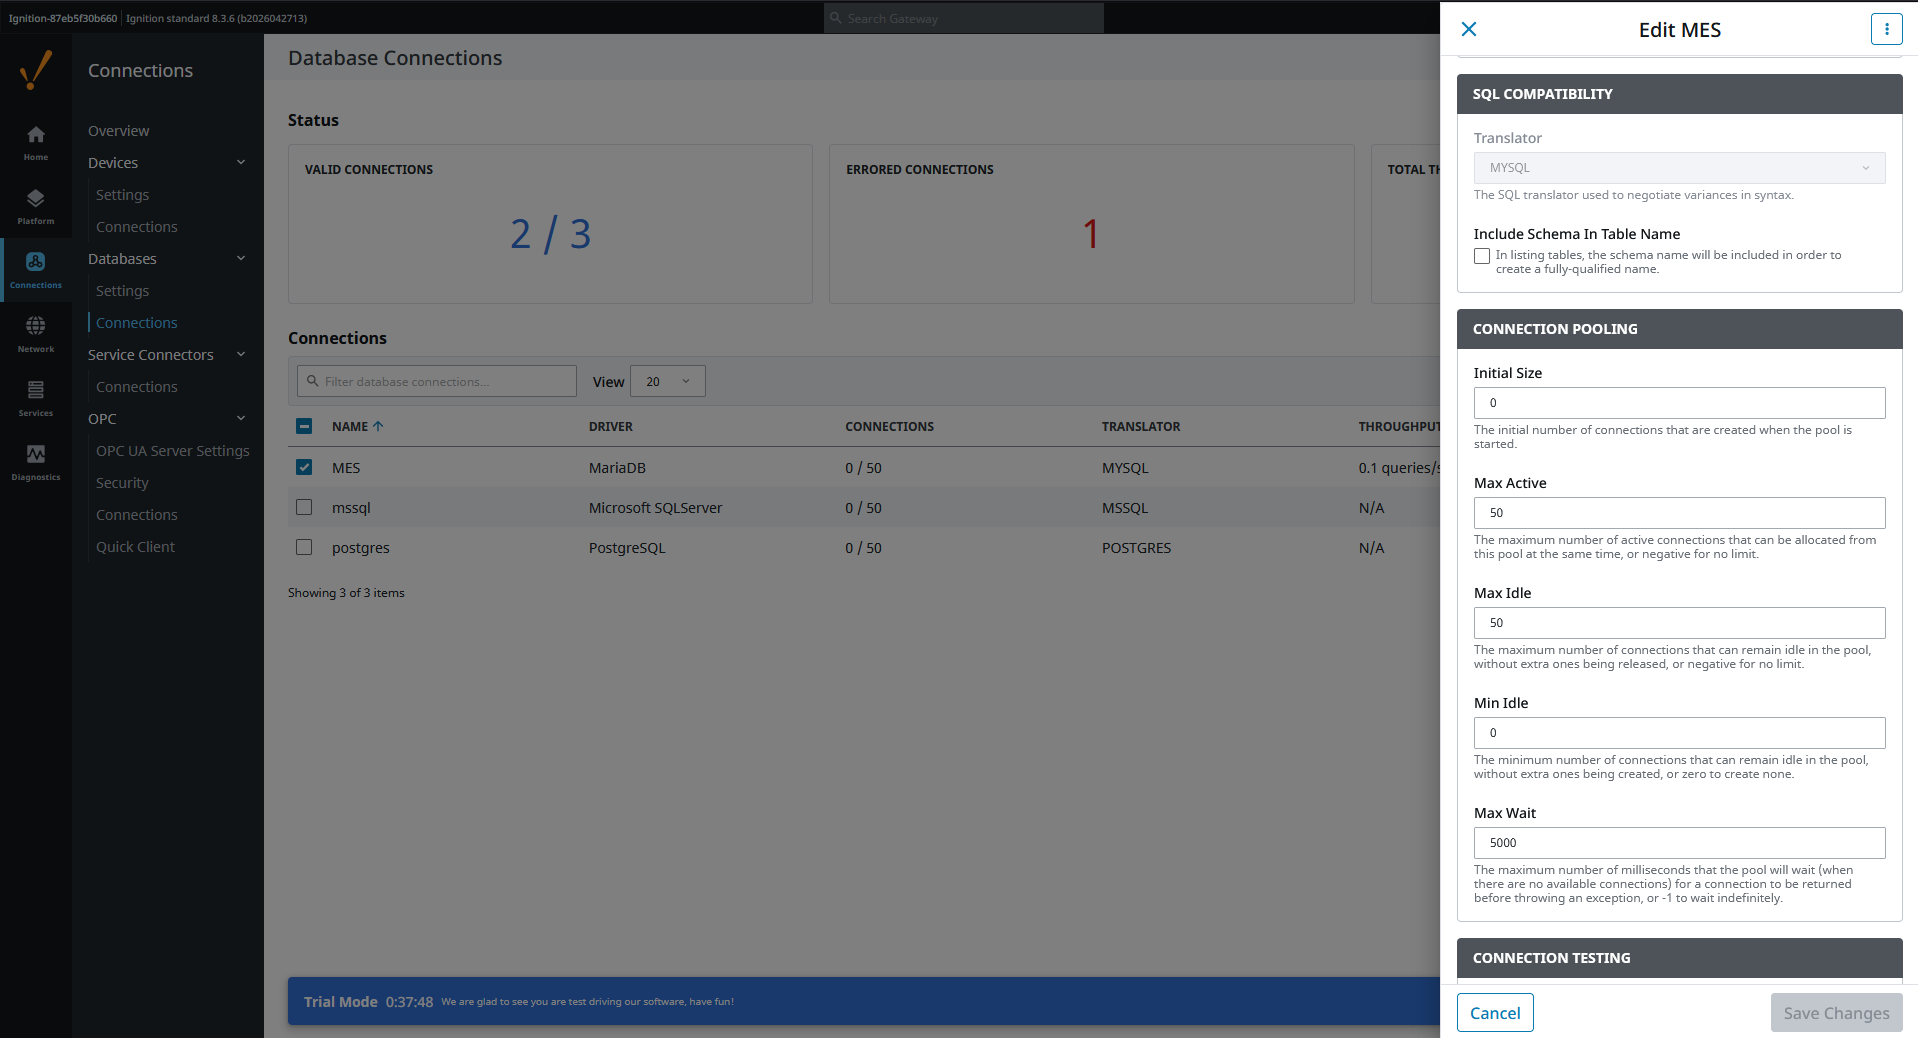
The same connection name will be selected on the next screen, so give it something memorable (TamakiMES is a good default).
5. Configure the module
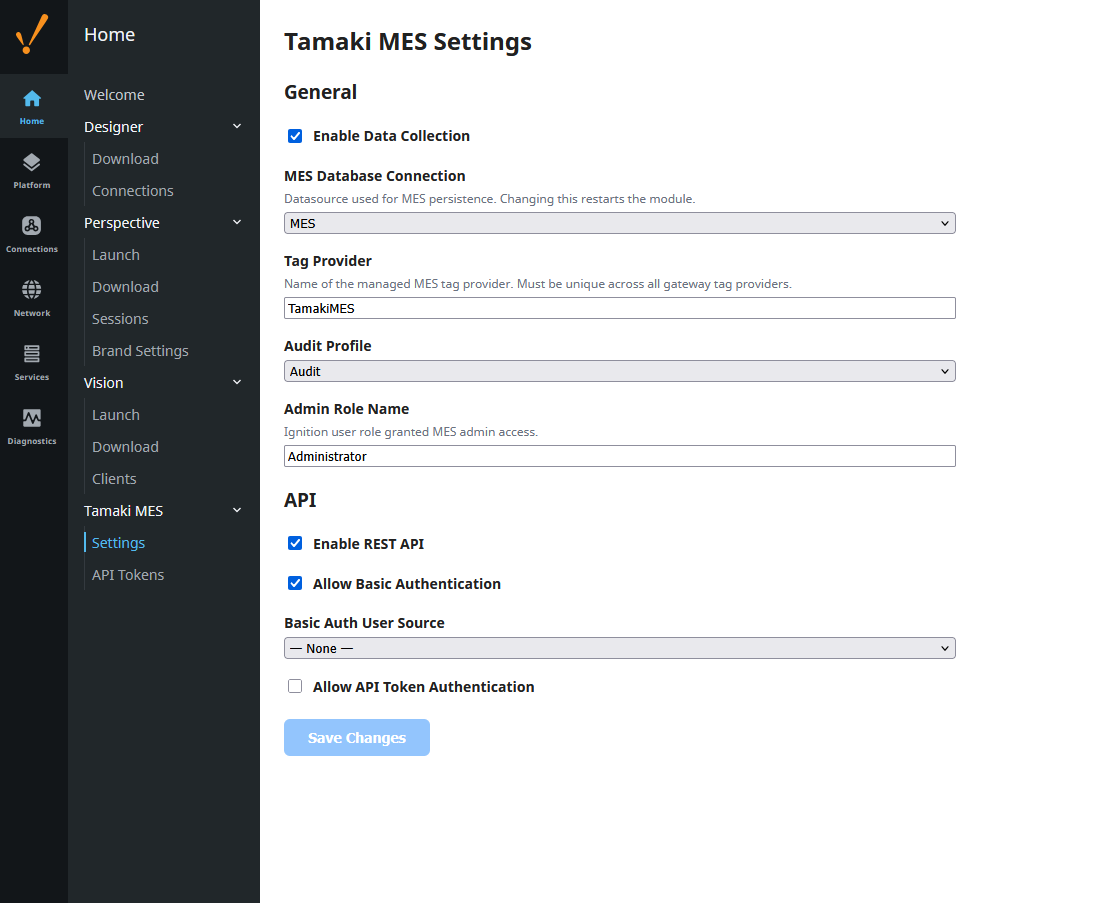
Go to Config → Tamaki MES → Settings. This is where the module learns which datasource to use and which tag provider to own.
| Setting | Default | What it does |
|---|---|---|
| Enable Data Collection | On | Master switch for OEE, shift, and schedule data collection. Leave on in production; turn off during initial commissioning if you want a quiet gateway while you build out your model. |
| Datasource | (none) | Ignition datasource used for every MES table. Must point at the empty schema you created in the previous step. Changing this setting later triggers a full module restart. |
| Tag Provider Name | TamakiMES | The tag provider Tamaki MES creates and owns. Rename only if you already have a provider called TamakiMES. |
| Audit Profile | (none) | Optional. Pick an audit profile if you want CRUD writes recorded in Ignition's audit log. |
| Admin Role Name | Administrator | Ignition role required for MES admin operations. Change to match your customer's role naming if you do not use the default Administrator role. |
Click Save Changes when done. A datasource change forces a full module restart; other changes apply immediately.
6. Verify
- Open Config → System → Console (or check your gateway log files) and look for
Tamaki MES started. - In your database client, connect to the schema and confirm the MES tables exist (you should see dozens of tables prefixed with module concerns like
mes_location,mes_material, etc.). - Back in the gateway, Status → Tags should now list a
TamakiMEStag provider (or whatever name you chose).
If any of these are missing, check the gateway log for migration errors: almost always either a permissions issue on the schema or a JDBC driver mismatch.
Next steps
- Install the Perspective project and set it up as a parent for your own project.
- Browse the Product Modules page if you have not already, to see what each licensed module gives you.
- Review best practices before you build anything for real.